When I first decided to make this Skinny Tuna Melt, I was a little nervous. I mean, who wouldn’t be? Tuna melts are usually oozing with cheese and mayo! But my goal was to keep it light while still keeping the flavors spot on. I think I definitely nailed it on my first try! The combination of low-fat cheese and Greek yogurt in place of mayo was a game-changer. A delightful surprise was how much flavor I got from simple spices. As I made it, I tweaked the ingredients a little, since I’m always on the hunt to make things even healthier without sacrificing yum! And let me tell you, this recipe is a keeper!
Skinny Tuna Melt
Ingredients
- 1 can 5 oz of tuna (packed in water, drained) - you can use canned salmon as a tasty substitute!
- 2 tablespoons of Greek yogurt plain - feel free to use light mayo if you prefer.
- 1 tablespoon of Dijon mustard - if you're not a mustard fan try a bit of lemon juice instead.
- ½ cup of shredded low-fat cheese like cheddar or mozzarella - any cheese you love will work!
- 2 slices of whole grain bread - switch it up with a gluten-free option if needed.
- Salt and pepper to taste
- Optional toppings: sliced tomatoes pickles, or even avocado – get creative!
Instructions
- Mix It Up: In a mixing bowl, combine the drained tuna, Greek yogurt, Dijon mustard, and a pinch of salt and pepper. Mix everything until it’s all blended oh-so-nicely. This is where you can taste and adjust. If you like a little zing, feel free to add more mustard!
- Cheese, Please: Now, fold in the shredded low-fat cheese until it’s mixed thoroughly. It’s like a cheesy hug for your tuna!
- Toast Time: Heat a non-stick skillet over medium heat. Lightly butter one side of each slice of bread (or use cooking spray for a healthier option!). Place one slice in the skillet, butter-side down.
- Assemble the Melt: Spread the tuna mixture evenly on top of the bread in the skillet. Then, add your optional toppings if you’re feeling fancy. Top it off with the second slice of bread, butter-side up.
- Flip It: After about 3-4 minutes, check the bottom slice of bread. Once it’s golden brown and crispy, flip the sandwich carefully using a spatula. Cook for another 3-4 minutes until that cheese is all melty and the bread is beautifully browned.
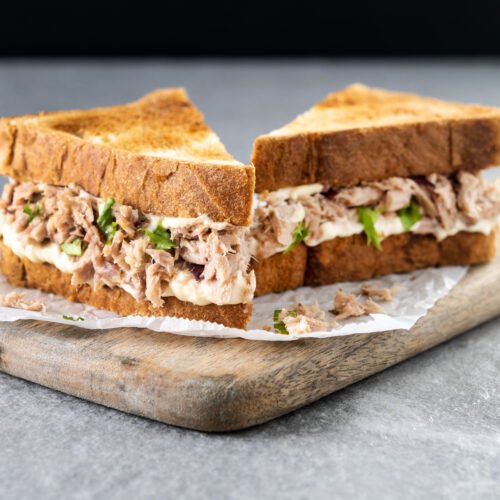
- Serve It Up: Once your Skinny Tuna Melt is ready, slice it in half and serve it warm. Enjoy this deliciousness on its own or with a side salad for a balanced meal!
Nutrition Facts
| Nutrient | Amount per Serving |
|---|---|
| Calories | 350 |
| Protein | 30g |
| Fat | 10g |
| Carbohydrates | 30g |
| Fiber | 4g |
5 Tips for This Recipe
- Try adding different spices like garlic powder or paprika for an extra kick!
- If you’re short on time, use pre-made tuna salad and just melt the cheese.
- Experiment with different types of bread—rye, sourdough, whatever you fancy!
- Check your tuna to make sure it’s packed in water for a lighter option.
- Don’t rush the cooking, let it brown perfectly for that delicious crunch!
5 FAQs for This Recipe
- Can I make this recipe ahead of time? Yes, you can prepare the tuna mixture a day in advance and assemble when ready.
- What can I serve with a Skinny Tuna Melt? A side salad, veggie sticks, or even sweet potato fries make great companions!
- Can I use a different kind of cheese? Absolutely! Anything goes—goat cheese, feta, or whatever you love!
- Is this suitable for kids? Yes! It’s a great way to get kids to eat tuna without overpowering flavors.
- Is it easy to make a vegan version? Yes! Use chickpeas in place of tuna and a dairy-free cheese.
5 Storage Tips
- Store the leftover tuna mixture in an airtight container for up to 3 days.
- Don’t assemble the sandwich until you’re ready to eat to keep bread fresh!
- Wrap the cooked sandwich in foil if you need to store it for a short time.
- Reheat it in a skillet for the best results rather than the microwave.
- Make sure your container is labeled with the date for freshness!
5 Common Cooking Mistakes
- Overcooking the sandwich can lead to dry bread—keep an eye on it!
- Not draining the tuna properly can make the mixture too watery.
- Skipping the toasting step results in a soggy melt—always toast it!
- Using too much spice can overpower the delicate flavor of the tuna.
- Not letting the sandwich sit for a minute after cooking can lead to an ooey-gooey mess when you slice it!
Final Thoughts
Creating this Skinny Tuna Melt turned out to be a fun and delicious journey! I really enjoyed simplifying the traditional recipe while keeping things light and tasty. With just a few swaps and easy steps, we managed to whip up something that feels indulgent but is surprisingly healthy. Each bite is packed with flavor, and it’s perfect whether you’re cooking for yourself or feeding a family. I hope you enjoy making and munching on this easy dish as much as I did!
So, gather your ingredients, mix it up, and savor the satisfaction of a wonderfully light meal. Happy cooking, friends!
Can’t wait to hear what you think about it when you give it a try. Cheers to crafting delicious memories in the kitchen, one Skinny Tuna Melt at a time!