So, here’s the gist—I was feeling adventurous one evening and decided to whip up this Baked Rice and Peas recipe for the first time. Initially, I thought, “How hard could it be?” Spoiler alert: I nailed it the first time! But hold on; there were a few surprises along the way. For one, the aroma that filled my kitchen was nothing short of heavenly. I almost didn’t want to wait for it to bake, but patience was key!
I realized I could amp up the flavors with just a couple more spices than the recipe called for, which made a world of difference. Next time I make this, I’m definitely adding a pinch of smoked paprika for that extra kick! Overall though, it turned out perfectly, and I can’t wait for you all to try it!
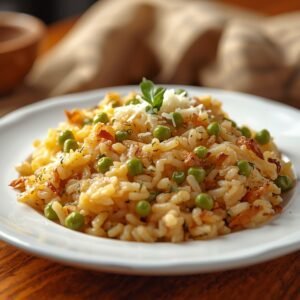
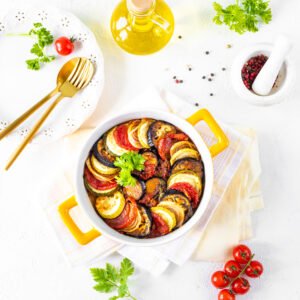
Baked Rice and Peas
Ingredients
- 1 cup of long-grain rice or you can use jasmine rice if you fancy!
- 1 ½ cups of vegetable broth or chicken broth for a non-vegetarian option
- 1 cup of canned green peas drained or frozen peas
- 1 medium onion finely chopped
- 2 cloves of garlic minced (or a teaspoon of garlic powder)
- 1 teaspoon of thyme dried or fresh
- 1 teaspoon of allspice
- 1 teaspoon of salt to taste
- 1 tablespoon of olive oil you can use coconut oil for a tropical twist
- Optional: a dash of hot sauce or chili flakes if you like things spicy!
Instructions
- Preheat the oven: Set your oven to 350°F (about 175°C). You'll want it nice and warm when it’s time to bake.
- Sauté the onions: In a medium skillet, heat the olive oil over medium heat. Toss in the chopped onion and cook for about 3-4 minutes until it gets all soft and sweet-smelling. Add the minced garlic and sauté for another minute.
- Mix it up: In a large mixing bowl, combine the rice, peas, sautéed onions and garlic, vegetable broth, thyme, allspice, and salt. Stir it all together until everything's cozy.
- Transfer to a baking dish: Pour the rice mixture into a greased baking dish (about 9x9 or medium-sized casserole works!). Make sure everything is spread evenly—you want every bit to cook nicely.
- Cover and Bake: Cover the dish with aluminum foil and pop it in the oven. Bake for 30 minutes, then remove the foil and bake for an additional 15-20 minutes until the rice is tender and the top looks golden brown!
- Fluff and Serve: Once it’s out of the oven, let it sit for about 5 minutes. Use a fork to fluff the rice, then serve it up while it’s warm!
Nutrition Facts
| Nutrient | Per Serving |
|---|---|
| Calories | 230 |
| Protein | 6g |
| Carbohydrates | 45g |
| Fat | 4g |
| Sodium | 300mg |
| Fiber | 3g |
5 Tips for This Recipe
- Always rinse your rice before using it! This helps remove excess starch and keeps it fluffy.
- If you’re using frozen peas, no need to thaw them; just throw them in as they are.
- Feel free to toss in more veggies—carrots or bell peppers would be lovely additions!
- For a zestier flavor, add a squeeze of lemon juice right before serving.
- Double the recipe for a potluck and prepare to impress your friends!
5 FAQs for This Recipe
- Can I make this dish vegan? Absolutely! Just stick with vegetable broth and you’ll be golden!
- Can I use brown rice instead? Yes, but you’ll need to adjust the cooking times and use more liquid!
- What can I serve with this? It pairs wonderfully with grilled chicken, fish, or just as a stand-alone vegetarian dish!
- Can I prepare this in advance? Yes! You can assemble it the night before, just pop it in the fridge, and then bake it before dinner!
- How do I know when it’s done? The rice should be tender and the liquid fully absorbed. If it looks dry, you can add a bit of broth during baking.
5 Storage Tips
- Store leftovers in an airtight container for up to 5 days in the fridge.
- If you want to freeze it, place it in a freezer-safe container and enjoy within 2-3 months!
- To reheat, sprinkle a little water on top before microwaving to keep it moist.
- This dish actually tastes even better the next day, as flavors bloom overnight!
- Label your containers with the date to keep track of how long they’ve been stored!
5 Common Cooking Mistakes
- Skipping the rinsing step can lead to sticky rice—no one wants that!
- Not covering the dish while baking can dry it out.
- Using too much liquid can make the rice soggy; follow the measurements closely.
- Underestimating the cook time can leave the rice hard and crunchy—be patient!
- Not letting it sit before serving leads to mushy rice—patience is a virtue!
Final Thoughts
And there you have it! Our Baked Rice and Peas recipe is super easy and oh-so-delicious. I love how warm and cozy it makes my kitchen smell while baking. You can definitely impress friends and family with this dish without spending hours in the kitchen!
We learned to blend flavors and were able to make tweaks that take this dish from good to *wow*! Whether you’re enjoying this as a main dish or a side, it’s a vibrant addition to any table.
So next time you’re looking for something comforting and flavorful, remember this Baked Rice and Peas recipe! I hope you give it a try and enjoy it as much as we do!