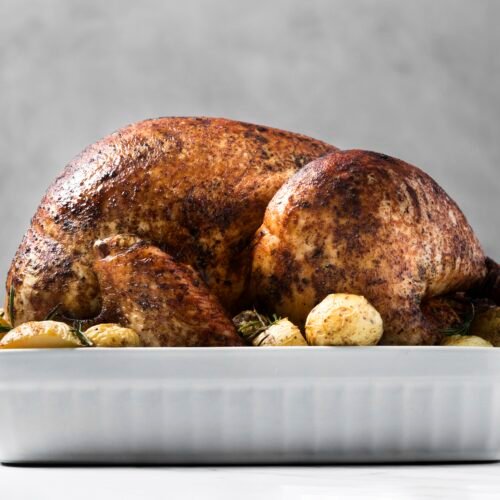
When I first tried my hand at dry brining, I was a little nervous. Would my turkey be salty? Would it be overcooked? The good news is that my turkey turned out better than I ever expected! The flavors were deep and savory, and the skin was like something out of a cooking show. The only surprise was how simple it was. After that first success, I tweaked my recipe slightly by adding some garlic powder and herbs to the mix – a much-appreciated flavor boost! Let’s break it down together.
Dry Brine Turkey
Ingredients
- 1 whole turkey 12-14 pounds
- 1/2 cup kosher salt or sea salt - just not table salt
- 1 tablespoon black pepper
- 1 tablespoon garlic powder optional, but delicious!
- 1 tablespoon onion powder optional
- Fresh herbs like thyme, rosemary, and sage, optional
- Vegetable oil or melted butter for roasting
- If you need substitutions feel free to swap the garlic powder for garlic salt (just reduce the kosher salt, of course) or add your favorite spices like smoked paprika or cayenne for a kick!
Instructions
- Prepare the Turkey: Start by pulling out your turkey and giving it a good rinse under cold water. Pat it dry with paper towels. This will help the brine stick nicely!
- Make the Dry Brine: In a bowl, mix together the kosher salt, black pepper, garlic powder, onion powder, and any fresh herbs you’re using. Give it a good stir.
- Brine Time: Now, gently rub the dry brine all over the turkey. Don’t forget to get into all the nooks and crannies – even the inside! You want to make sure every bit of the bird is covered in that flavor-packed goodness.
- Let it Chill: Place your turkey on a large baking sheet or in a roasting pan, then pop it into the fridge. Remember, the longer it sits, the more flavor it packs in. Aim for at least 24 hours; if you can go for 2-3 days, you're in for a real treat!
- Prepping for Roast Day: On roast day, take that turkey out of the fridge (you can leave it at room temperature for about an hour while the oven preheats). Preheat your oven to 325°F (165°C).
- Final Touches: Now, brush that turkey with vegetable oil or melted butter. This will help deliver that mouth-watering crispy skin we’re all dreaming about!
- Into the Oven: Put your turkey in the oven and roast it. A good rule of thumb is to cook it for about 13-15 minutes per pound. For a 14-pound turkey, that’s approximately 3 to 3.5 hours.
- Check for Doneness: Use a meat thermometer to check that the thickest part of the thigh reads 165°F. Once done, take it out and let it rest for at least 30 minutes before carving. This helps the juices redistribute, making every slice juicy and tender.
Cooking Tips
Here are some quick tips to ensure your dry brined turkey turns out perfect!
- 1. Use quality salt – kosher salt is best because it’s less salty than table salt, making it easier to control the seasoning.
- 2. Don’t skip resting time – patience is key for juicy turkey!
- 3. Feel free to experiment with spices – make this recipe yours!
- 4. Use a drippings pan for flavorful gravy.
- 5. Make sure to monitor the turkey’s internal temperature.
Frequently Asked Questions
Here are some common questions folks have about dry brining:
- 1. What’s the difference between dry brining and wet brining?
- 2. Can I dry brine a turkey that’s been frozen?
- 3. How do I know my turkey is fully cooked?
- 4. Is dry brining safe?
- 5. Can I dry brine chicken or pork, too?
Storage Tips
After the feast, here’s how to store any leftovers:
- 1. Refrigerate turkey leftovers in an airtight container within two hours of cooking.
- 2. Properly stored, turkey can last about 3-4 days in the fridge.
- 3. For longer storage, consider freezing in portions, which can last up to 6 months.
- 4. If you’re reheating, add a little broth to keep it moist.
- 5. Always label and date your containers!
Common Cooking Mistakes
A few pitfalls to avoid:
- 1. Using table salt instead of kosher salt – it will make your turkey way too salty!
- 2. Forgetting to rest the turkey – it’s crucial for juicy meat!
- 3. Not checking the internal temperature – eyeballing isn’t enough!
- 4. Rushing the brining process – aim for at least 24 hours.
- 5. Skipping the oil or butter for roasting – it helps crisp the skin!
Final Thoughts
Dry brining truly transformed how I prepare turkey, making the process simple and the results mouthwateringly delicious. The flavors sink in beautifully, and the crispy skin? Absolute perfection! With a little patience and a sprinkle of enthusiasm, anyone can master this technique. Whether it’s Thanksgiving or just for the thrill of a well-cooked meal, I encourage you to try dry brining this holiday season. I’m so excited for you to taste the difference!
So, gather your loved ones, cook up this incredible dry-brined turkey, and make some delicious memories around the dinner table! It’s time to enjoy that juicy, flavorful turkey – and watch everyone come back for seconds!
Happy cooking, and may your turkey adventures be as festive as they are tasty!