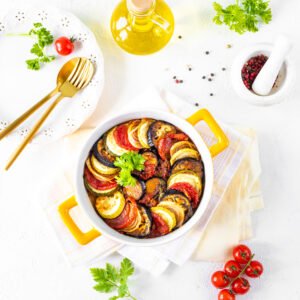
When I first made these Hummus Pinwheels, I actually NAILed it on my very first try! I’m telling you, they rolled up beautifully, and the colors were just popping. However, to my surprise, I realized I could make these even more fun by adding a few extra ingredients, and boy, did they become a hit! I found that adding sliced bell peppers and a few spinach leaves made a world of difference in taste and crunch. The best part? They look super fancy, but they’re a breeze to make. Let’s dive into the good stuff!

Hummus Pinwheels
Ingredients
- **Tortillas** 8 inches—you can use whole wheat, spinach, or regular flour tortillas.
- **Hummus** about 1 cup—use your favorite flavor! Classic, roasted red pepper, or garlic work well.
- **Cucumber** 1 medium—sliced thinly.
- **Bell pepper** 1 medium—sliced into strips; any color works!
- **Carrots** 1 medium—grated or julienned for that lovely crunch.
- **Spinach or mixed greens** 1 cup—to sprinkle inside your roll-ups.
- **Feta cheese** optional—crumbled; it adds a nice salty kick!
- **Olives** optional—sliced, if you want to get adventurous!
- Substitutions:
- - If you don’t have tortillas try using large lettuce leaves for a low-carb option.
- - Swap hummus with cream cheese or a bean spread for a different flavor.
Instructions
- Start by laying out your tortilla flat on a clean surface. Think of it like your canvas!
- Spread a generous layer of hummus over the tortilla. Get creative and cover the whole thing. It’s like frosting a cake but way healthier!
- Now for the veggies! Sprinkle the sliced cucumbers, bell peppers, grated carrots, and spinach evenly across the hummus.
- If you’re feeling fancy, toss in some crumbled feta or olives—you do you!
- Gently start rolling the tortilla from one end to the other. Keep it tight but not so tight that the filling squeezes out the sides.
- Once rolled up, snip the ends with a knife (or eat the ends if you’re feeling snacky). Then slice the roll into 1-inch pinwheels.
- Arrange your lovely pinwheels on a plate, and voilà! Snack time awaits!
Nutrition Facts
| Calories | 120 |
|---|---|
| Protein | 4g |
| Carbohydrates | 20g |
| Fat | 3g |
| Sugar | 2g |
| Fiber | 3g |
5 Tips for This Recipe
1. Use fresh ingredients! Fresh veggies make all the difference.
2. Don’t overload on the filling; too much stuffing can make rolling difficult.
3. If you’re making these ahead of time, wrap them tightly in plastic wrap to keep them fresh.
4. Slice with a serrated knife for clean cuts—trust me on this one!
5. Experiment! Try adding roasted veggies or different spreads to mix it up.
5 FAQs for This Recipe
1. Can I make these ahead of time? Yes! Make them a day in advance and store them in the fridge wrapped tightly.
2. Are these gluten-free? Use gluten-free tortillas or lettuce wraps to make them gluten-free.
3. What can I serve these with? They’re great on their own, but you can pair them with a dip like tzatziki or extra hummus.
4. Can I freeze these pinwheels? It’s best not to freeze them, as the veggies can become mushy once thawed.
5. How long do they last in the fridge? They stay fresh for about 3–4 days in the fridge.
5 Storage Tips
1. Wrap each pinwheel tightly in plastic wrap to keep them fresh.
2. Store them in an airtight container so they don’t get dried out.
3. Keep them in the fridge for the best taste and crunch.
4. Don’t slice them until you’re ready to eat for maximum freshness.
5. If you have extra filling, store that separately in the fridge for up to 4 days.
5 Common Cooking Mistakes
1. Not rolling tightly enough—keep that filling snug!
2. Overfilling your tortilla can lead to messy pinwheels.
3. Skipping the fresh ingredients—freshness is key!
4. Not letting the hummus come to room temperature can make spreading challenging.
5. Forgetting to seal the ends can result in the filling spilling out—yikes!
Final Thoughts
I really had a blast making these Hummus Pinwheels, and I hope you do too! They’re not just simple to make but also a fantastic way to mix and match your favorite flavors and ingredients. Plus, they’re perfect for any occasion, whether you’re hosting friends or just snacking on your own. We loved how colorful and appetizing they looked, and they disappeared from the plate in no time. Give it a try and let your creative juices flow by adding all your favorite toppings. Let’s keep rolling those pinwheels!
There’s something special about making your own food, especially when it’s as easy and delicious as this. You may find yourself whipping these up regularly, just like I have. So, let’s gather those ingredients and get pinwheel-ing!
Happy cooking, and I can’t wait to hear how yours turned out!