Let me set the scene! The other day, I decided to brave the kitchen to create Yogurt Panna Cotta. Did I nail it on the first try? Oh, yes! I felt like a kitchen wizard casting a spell of deliciousness. However, I did have a surprise moment when I realized I ran out of gelatin! Yikes! But you know what? Thankfully, a little bit of grass-fed gelatin I found at the back of the pantry came in clutch. I made a mental note to check my supplies next time! The taste was heavenly, but on my first attempt, the panna cotta was a tad too sweet. So, I dialed down the sugar just a smidgen to find the perfect balance. Now I’m the proud parent of a delicious and pretty dessert!

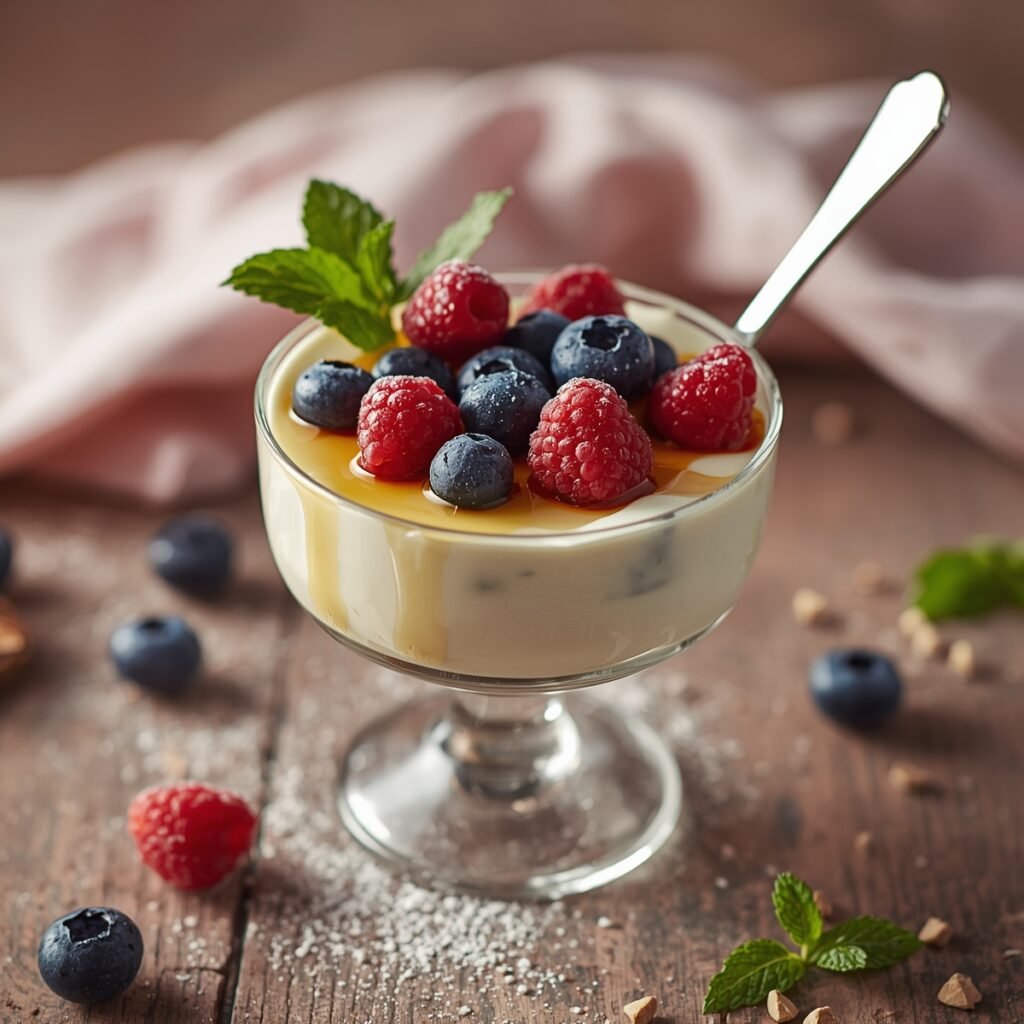
Yogurt Panna Cotta
Ingredients
- 1 cup plain yogurt Greek yogurt works great, but any plain yogurt will do!
- 1 cup heavy cream you can substitute half-and-half if you want a lighter version
- 1/2 cup sugar feel free to use honey or maple syrup for a twist!
- 2 teaspoons unflavored gelatin or agar-agar for a vegan option—just follow the packet instructions!
- 1/4 cup water for blooming the gelatin
- 1 teaspoon vanilla extract or the zest of a lemon for a citrusy kick
Instructions
- Bloom the Gelatin: In a small bowl, sprinkle the gelatin over the water and let it sit for about 5 minutes to bloom (that's just a fancy way of saying 'soak up the water').
- Heat the Cream: In a saucepan, combine the heavy cream and sugar. Over medium heat, stir until the sugar dissolves and the mixture is warm (not boiling).
- Add the Bloomed Gelatin: Once the cream is warm, remove it from the heat. Stir in the bloomed gelatin until it fully dissolves. This part is super important for that smooth texture!
- Mix with Yogurt: Now let’s incorporate the yogurt and vanilla into this dreamy mixture. Whisk until everything is combined nicely and smooth.
- Pour and Chill: Grab your favorite dessert cups or ramekins and pour the mixture in. Pop them in the fridge for at least 4 hours, or until set. Go enjoy a movie or a snack while the magic happens!
- Serve & Enjoy: When it’s party time, you can top it with fruit, a drizzle of honey, or even a sprinkle of nuts. Get creative and dig in!
Nutrition Facts
| Calories | Protein | Fat | Carbs | Sugar |
|---|---|---|---|---|
| 220 | 5g | 14g | 24g | 20g |
5 Tips for This Recipe
- Adjust Sweetness: When incorporating sugar, taste test along the way to find your sweet spot!
- Experiment: Try different flavors like espresso, chocolate, or fruit purees.
- Chill Properly: A solid 4-hour chill is key—don’t rush it!
- Quality Ingredients Matter: Use good quality yogurt and cream for the best texture and flavor.
- Garnish Creatively: Use fresh fruits, chocolate shavings, or herbs to dress up your panna cotta!
5 FAQs for This Recipe
- Can I make this dairy-free? Yes! Just substitute the yogurt and cream with coconut yogurt and coconut milk!
- Is it safe to consume gelatin? Yes, it’s perfectly safe, but if you’re vegan, agar-agar is a great alternative!
- How long does it last in the fridge? Enjoy it within 4-5 days.
- Can I double the recipe? Absolutely! Just ensure you have enough cups!
- What should I serve it with? Fresh fruit, a compote, or chocolate sauce will take it to the next level!
5 Storage Tips
- Keep Covered: Store panna cotta in an airtight container or cover it with plastic wrap to maintain freshness.
- Label and Date: If you’re making multiple desserts, label them for convenience.
- Separate from Toppings: Store toppings separately to keep the panna cotta intact in the fridge.
- Use Glass Containers: They keep the panna cotta fresher and let you show off that pretty layer!
- Chill Thoroughly: Make sure it’s fully set before moving it to any container!
5 Common Cooking Mistakes
- Not Blooming the Gelatin: Skipping this step can lead to clumps—yikes!
- Overheating Cream: Boiling is a no-no! Keep it warm.
- Skipping the Chill: Impatience can ruin the silky texture!
- Too Much Agitation: Whisking too vigorously can introduce air. Gently does it!
- Not Using Fresh Ingredients: Old or expired yogurt can impact flavor. Fresh is best!
Final Thoughts
So there you have it, our delightful journey into making Yogurt Panna Cotta! This creamy, dreamy dessert is not just an impressive treat; it’s a canvas for your creativity. Whether you keep it plain or add toppings galore, you can’t go wrong! With just a handful of ingredients and some waiting time, you’re all set to impress your friends and family.
I had a blast crafting this recipe and figuring out what worked best for my sweet tooth. I hope you’ll find your unique touch with this dessert too! Don’t be surprised if you find yourself making it again and again.
Let’s not forget that cooking should be fun, so don’t stress too much if things don’t go perfectly—just enjoy the delicious results, and share the love!