When I first attempted this Cauliflower Mac and Cheese, I was feeling a bit skeptical. How could cauliflower possibly replace my beloved pasta? But you know what? The moment I took that first cheesy bite, I realized I had totally nailed it on my first try! The cauliflower blended so beautifully with the cheese sauce; it was like destiny in a bowl! A little surprise came when I discovered that my cheese sauce turned out creamier than I’d ever imagined, and I couldn’t stop eating it!
One little tweak I made was adding a sprinkle of garlic powder to the cheese sauce, and let me tell you, it took things to the next level! Such a simple addition made the flavors pop. Every time I make it, I stick to that tweak – it’s now a must!
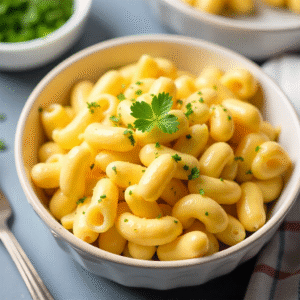
Cauliflower Mac and Cheese
Ingredients
- 1 medium head of cauliflower cut into florets; you can substitute with broccoli if you like
- 2 cups sharp cheddar cheese shredded; feel free to mix in some mozzarella for extra stretchiness
- ½ cup cream cheese softened; can swap for Greek yogurt for a healthier option
- 1 cup milk any kind works; almond milk is a great dairy-free alternative
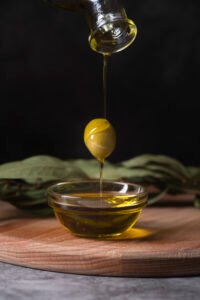
- 2 tablespoons butter
- 2 tablespoons all-purpose flour for thickening; cornstarch can be used for a gluten-free option
- 1 teaspoon garlic powder optional, but seriously recommend!
- Salt and pepper to taste
- ½ teaspoon paprika for a little kick
- ½ cup breadcrumbs optional for topping; panko is great for crunch
Instructions
- Boil the Cauliflower: Grab a big pot and fill it with water. Bring it to a boil, then toss in your cauliflower florets. Let them cook for about 5-7 minutes until they’re tender but not mushy. We want them to hold their shape!
- Drain and Set Aside: Once they’re done, drain the cauliflower and set it aside to cool.
- Create the Cheese Sauce: In a medium saucepan, melt the butter over medium heat. Once it’s melted, whisk in the flour and let it cook for about a minute. This will create a thick paste.
- Add the Milk: Gradually pour in the milk while whisking continuously to avoid lumps. Keep stirring until the mixture thickens, about 3-5 minutes.
- Cheesy Goodness: Lower the heat and mix in cream cheese followed by the shredded cheddar. Stir until the cheese melts and you have a smooth, creamy sauce. If it looks too thick, just add a splash more milk!
- Flavor Boost: Sprinkle in your garlic powder, paprika, salt, and pepper. Give it one last good stir!
- Combine! Gently fold in the cooked cauliflower florets to the cheesy sauce, making sure every piece is coated.
- Optional Topping: If you want that crispy top, pour everything into a greased baking dish, sprinkle breadcrumbs (or panko) on top, and pop it into a preheated oven at 350°F (175°C) for about 15 minutes, or until it’s bubbly and golden!
- Serve and Enjoy: Time to dig in! Scoop yourself a hearty bowl and enjoy this creamy, cheesy explosion of flavor!
Nutrition Facts
| Calories | Fat | Carbohydrates | Protein |
|---|---|---|---|
| 350 | 20g | 15g | 25g |
5 Tips for This Recipe
- Don’t Overcook the Cauliflower: You want it to be tender but still firm to hold together in the dish.
- Experiment with Cheese: Try mixing different types of cheese for a more complex flavor!
- Add Veggies: Feel free to mix in cooked broccoli or spinach for extra nutrition!
- Season to Taste: Don’t be shy with the spices. Adjust according to your palate!
- Use Whole Cauliflower: If you have leftovers, save the florets for soup or stir-frying!
5 FAQs for This Recipe
- Can I make this dish ahead of time? Absolutely! You can prepare it a day in advance and reheat it when you’re ready to serve.
- Is this recipe gluten-free? By using cornstarch instead of flour, you can make it gluten-free! Just check your cheese options too!
- What if I don’t have cream cheese? No worries! Greek yogurt or even sour cream can be used as alternatives.
- Can I freeze this dish? Yes! Just make sure it’s in an airtight container. It can be frozen for up to 2 months.
- How can I make it vegan? Use nutritional yeast instead of cheese, and almond milk with a vegan cream cheese substitute to make a scrumptious vegan version!
5 Storage Tips
- Cool Before Storing: Always let it cool down completely before placing it in the fridge!
- Airtight Containers: Use airtight containers to keep it fresh and prevent any odors from the fridge.
- Label and Date: If you’re freezing portions, label them with dates so you know what to eat first!
- Reheat on Low: When reheating, do it on low heat to avoid drying out the cheese sauce.
- Stir Before Serving: When you reheat, stir it to help distribute moisture and creaminess.
5 Common Cooking Mistakes
- Cooking Cauliflower Too Long: Overcooked cauliflower can turn mushy – aim for tender but firm for the best texture.
- Not Stirring the Chees sauce: Stirring is key to prevent lumps in your cheese sauce and get that smooth texture.
- Skipping the Seasoning: Make sure to taste your cheese sauce! A pinch of salt or spice can really enhance the flavor.
- Using Low-Quality Cheese: Quality matters; opt for fresh, good-quality cheese for that creamy goodness.
- Baking Too Long: If you choose to bake it, keep an eye on it! You just want that bubbly, golden top—no burnouts!
Final Thoughts
And there you have it, my cheesy friends! This Cauliflower Mac and Cheese not only brings joy to our plates but also makes it easy to sneak in some veggies without sacrificing flavor. I shared my ups and downs with this recipe, but the end result was a comforting, creamy dish that surprised us all.
With a few tweaks and substitutions, you can make this your own, allowing every bite to sing with flavors you love! Whether it’s for dinner or a cozy night in, this dish is sure to please everyone at your table.
So grab your apron, and let’s keep creating delicious memories in the kitchen. Happy cooking, and enjoy this delightful twist on a classic!