When I first attempted this recipe, I was super excited but also a bit nervous. It was a sunny Sunday afternoon, and I was hosting a small get-together with friends. To my surprise, my first batch came out beautifully! The yolk mixture was creamy and smooth. Even better, my friends loved them! However, I realized they could use a bit more kick, so I tweaked the seasoning a bit, adding just a hint more mustard and smoked paprika. The result? A flavor explosion that had everyone coming back for seconds! That’s the beauty of cooking—it’s all about experimenting to find that perfect balance!
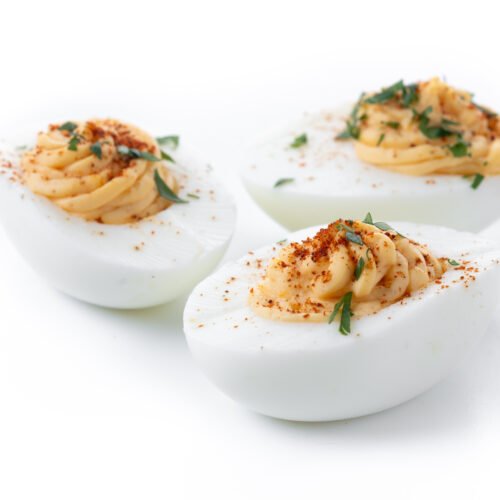
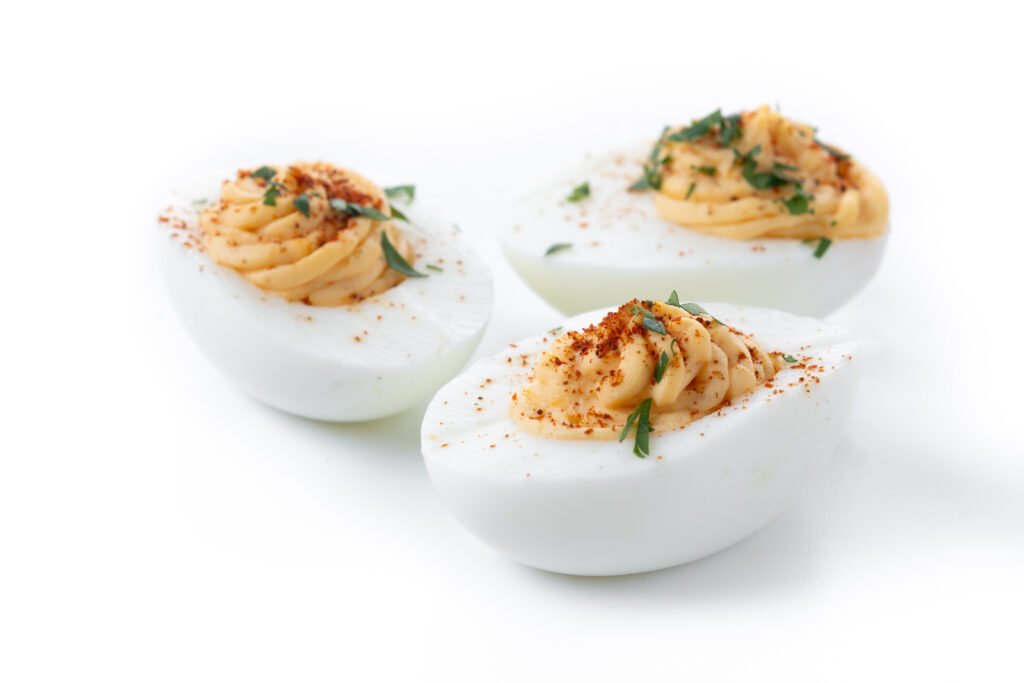
Deviled Eggs
Ingredients
- 6 large eggs
- 1/4 cup mayonnaise
- 1 teaspoon Dijon mustard you can also use yellow mustard if that’s what you have on hand
- 1/2 teaspoon white vinegar
- 1/8 teaspoon salt
- 1/8 teaspoon black pepper
- 1/4 teaspoon smoked paprika for a touch of smokiness
- Chopped fresh herbs like chives or parsley for garnish
Instructions
- Boil the Eggs: Start by putting the eggs in a saucepan and filling it with water until the eggs are covered by about an inch. Bring that water to a **boil** over medium-high heat. Once it boils, cover the pot, remove it from the heat, and let sit for **12 minutes**. Time to chill and plan the next steps!
- Cool the Eggs: After the timer goes off, move the eggs to a bowl filled with ice water. This will stop the cooking process and make them easier to peel. Let them hang out in this ice bath for about **5 minutes**.
- Peel the Eggs: Gently crack the eggs and start peeling under running water. This not only helps remove the shell but also makes it easier! Once peeled, slice each egg in half lengthwise carefully.
- Make the Filling: Now for the fun part! Pop those delicious yolks into a mixing bowl and mash them with a fork. Add in the mayonnaise, Dijon mustard, white vinegar, salt, pepper, and smoked paprika. Mix until everything is well combined and creamy—tasting as you go is totally encouraged!
- Fill the Eggs: Grab a spoon or a piping bag if you’re feeling fancy and fill those egg whites with the yolk mixture. Don’t worry about being perfect; a rustic look is so much more charming!
- Garnish: Top your deviled eggs with some freshly chopped herbs and a sprinkle of paprika for extra flair. Voila! You just made delicious deviled eggs that everyone will love.
Nutritional Facts
| Nutrition Information | Amount per Serving |
|---|---|
| Calories | 70 |
| Total Fat | 5g |
| Saturated Fat | 1g |
| Cholesterol | 186mg |
| Sodium | 95mg |
| Carbohydrates | 1g |
| Protein | 6g |
5 Tips for This Recipe
- Perfectly Hard-Boiled: Use older eggs for easier peeling!
- Flavor Play: Don’t be shy! Adjust mustard and spices to your liking.
- Pipe It! Use a piping bag for a professional finish.
- Chill Out: Refrigerate the deviled eggs for at least an hour to let flavors meld.
- Experiment: Try adding other ingredients like sriracha, bacon, or relish for new flavors!
5 FAQs for This Recipe
- Can I make deviled eggs ahead of time? Absolutely! Just store them in the fridge.
- What’s the best way to halve the eggs? Use a sharp knife and wipe it clean between cuts.
- Can I use greek yogurt instead of mayonnaise? Yes! It adds a bit of tanginess.
- How long do deviled eggs last? They can last for about 3-5 days in the fridge.
- Can I freeze deviled eggs? It’s not recommended; the texture might not hold up!
5 Storage Tips
- Keep It Cool: Store in an airtight container in the refrigerator.
- Label: Write the date on the container so you know how fresh they are!
- Cover with Plastic: If you don’t have a container, cover with plastic wrap.
- Don’t Stack: To avoid squishing, lay them flat!
- Separate Dressing: If bulk making, keep the yolk mixture separate until you’re ready to serve!
5 Common Cooking Mistakes
- Overcooking the Eggs: This can make yolks crumbly and give a green ring!
- Not Chilling: Skipping the ice bath can lead to harder to peel eggs!
- Skipping Flavoring: Don’t forget this step; it makes all the difference!
- Too Much Filling: Piling on too much can make the eggs unbalanced and messy!
- Underseasoning: Remember to taste; seasoning is key for good flavor!
Final Thoughts
Making deviled eggs is truly a delightful experience—surprising, rewarding, and definitely tasty! From the satisfying task of boiling and peeling the eggs to mixing up that creamy filling, each step is a chance to get creative. I hope you’ve enjoyed following my journey and that you feel encouraged to try this recipe yourself! With just a few ingredients, you can whip up a classic that’s sure to be a hit. So gather your friends or family, and make some deviled eggs; they won’t last long. Enjoy your cooking adventure!
Remember, the kitchen is all about having fun and experimenting! So go ahead, put your twist on this recipe and make it truly your own!
Happy deviling!